Installation
I assume you already know how to install WordPress, many Web-hosts provide 1-Click interface to install one of the Most popular CMS today, WordPress!
For detailed WordPress installation instructions visit http://codex.wordpress.org/Installing_WordPress

Check out this Youtube video for Demo site installation https://youtu.be/uu4qPUe8PJ8 (This video might be for other theme, but the installation process is exactly same)
Uploading Plumbersx Theme
Before moving to installation, we first need to upload theme to WordPress. (Assuming you are logged into wp-admin already at this point). Here is what to do next...
- Download theme from Themeforest. Please download All Files and Documentation and Not Installable WordPress files only.
- Unzip that folder on your local PC/Mac
- Inside that folder, you will find a zip plumbersx.zip around 200KB - 5MB of size. (this is the WordPress theme)
- Go to your wp-admin dashboard, then go to Appearance -> Themes -> Add new, and upload plumbersx.zip, and then activate the theme.
- Immediately skip to below section please.
Installing Plumbersx Theme
The theme comes with 1-Click installer and demo setup, you only need to follow below simple instructions.
- As soon as you activate the theme, you will be forwarded to install few plugins, please install theme, and then activate them. (refer image 1 below)
- Click on Dashboard link on Left bar, on the top. (We do this to trigger the plugins we just activated)
- Go to Theme Options > Welcome (If you dont see this link, all required plugins are not activated yet then.) (refer image 3 below)
- Follow easy on-screen instructions. ( Enter your purchase key, and then click on Demo Setup tab ).
- After clicking Run Demo Importer button, you will be forwarded to a page with available Demos, chose the one that you like and click Import Demo on it. ( If you do not find Run Demo Importer button, you can also find it in wp-admin/appearance/Import Demo Data.
- Follow on-screen process.
- Last step is to import default Elementor settings. Open this link please https://www.dropbox.com/sh/xirls8nw9ix54wd/AAAdG7Xs5XwOQ0hCdrVYAUOAa?dl=0 From this link, Select the zip with prefix same name as the demo you imported. For example, if you imported Demo 1, click on the zip file name starts with Demo-1.
- From next page, Download this zip file from the right top Download button.
- On Wp-admin go to Elementor/tools Click on Import/Export Kit tab. ( If you dont see this tab, go to Elementor/Settings/Experiments and Enable this tab ).
Go to wp-admin/Elementor/Tools/Import Export Kit, and Click on the Start Import button, and import the zip you just downloaded.
Thats it !
If you are stuck, you can refer the Video above, and if you need assistance, contact us.
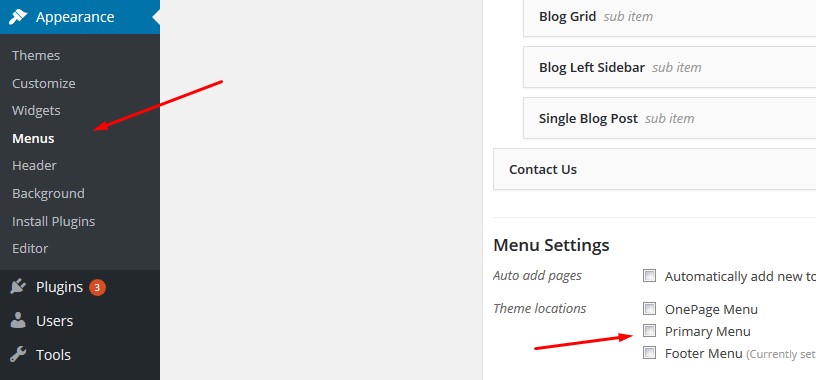
Note: If for some reason, menus does not get assigned automatically, please go to wp-admin/Appearance->Menus to assign menu. (refer image 4 below)
The above process is automatic and thus is technical. There are chances things might go wrong depending on your server's technical settings. Feel free to contact us if you have any trouble.
Now you should have Theme installed and setup just like demo. Now lets see how to edit things to match theme to your business.
Please also check FAQ section below for more answers.
Image 1 (referred above)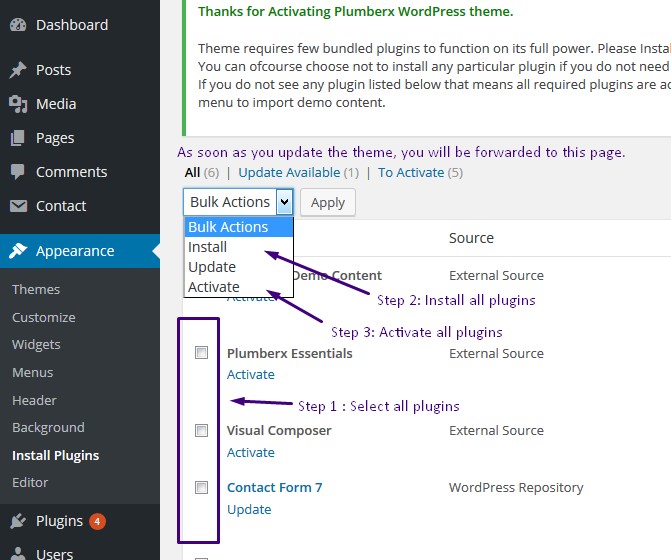
Image 3 (referred above)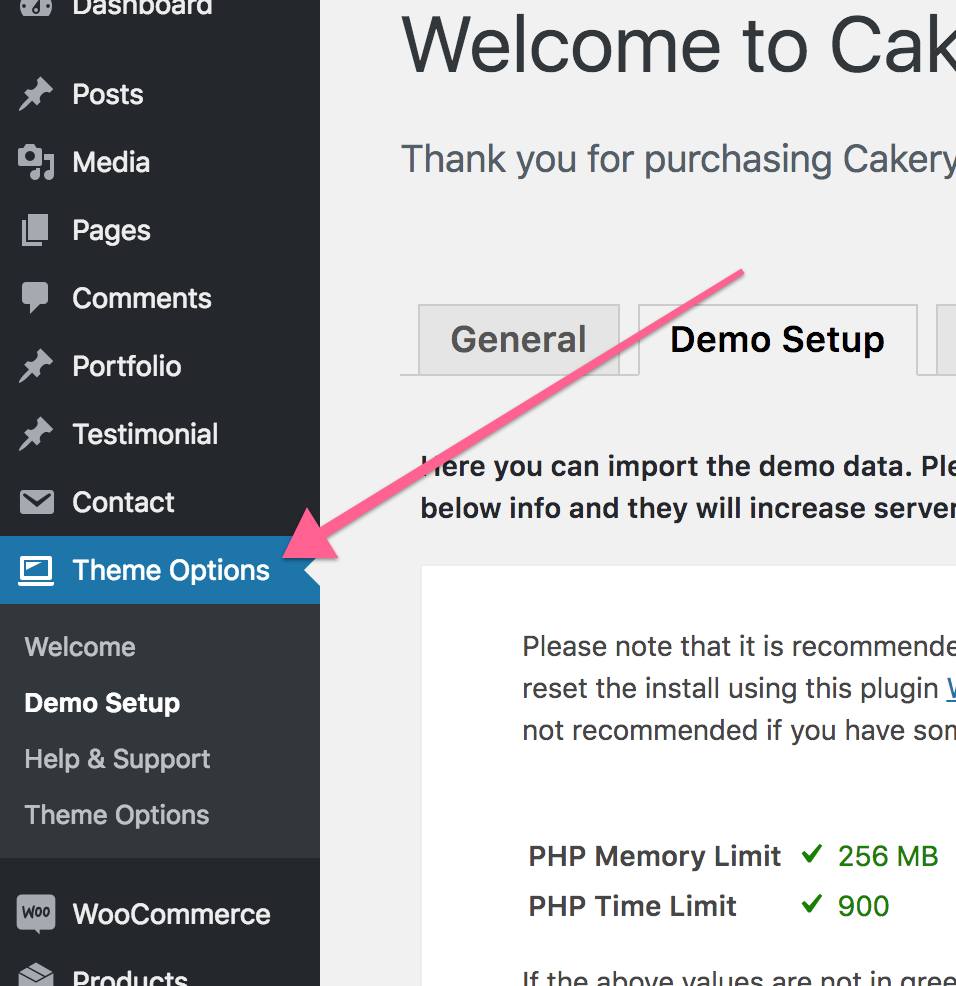
Image 4 (referred above)